Of course! Here is a complete DIY Easter decor set guide, featuring projects with different styles and skill levels to create a beautiful, cohesive look for your home.
Themed DIY Easter Decor Set: “A Natural & Blush Spring”
This set uses a soft, natural color palette of creamy whites, blush pinks, sage green, and tan. The materials are a mix of natural elements (eggs, twigs, moss) and delicate accents.
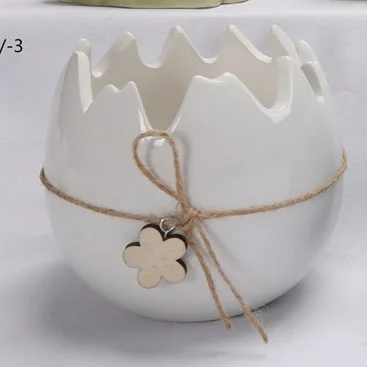
Project 1: Blown-Out Egg Vases (Centerpiece)
These are elegant and make a stunning table centerpiece.
You’ll need:
-
Raw eggs (6-12, depending on your vase size)
-
A small nail, needle, or specialty egg-blowing tool
-
A bowl
-
Small, delicate flowers (like lilacs, small daisies, baby’s breath, or faux sprigs)
-
Water
Instructions:
-
Poke Holes: Carefully poke a small hole in the top (narrow end) of an egg and a slightly larger hole in the bottom. Use the needle to gently break the yolk inside by swirling it around.
-
Blow Out the Egg: Hold the egg over the bowl. Blow firmly into the small top hole. The egg contents should squeeze out of the bottom hole into the bowl. (You can use the eggs for cooking!).
-
Rinse: Rinse the empty shell gently under cool water and let it dry completely.
-
Display: Carefully fill each shell with a little water and place a single small flower stem or a few tiny sprigs inside. Arrange them in a rustic bowl or on a bed of moss on a cake stand.
Pro Tip: For extra stability, place a small ball of museum putty or sticky tack in the bowl before placing the egg.
Project 2: Natural Moss & Twig Nest (Display Base)
These nests are perfect for holding your decorative eggs or as standalone pieces.
You’ll need:
-
Spanish moss or sheet moss
-
Flexible twigs (like willow, grapevine, or even long, dry grass)
-
Scissors
-
Twine or floral wire (optional)
-
Small decorative eggs (wood, ceramic, or painted plastic)
Instructions:
-
Form the Base: Take a handful of moss and shape it into a loose circle, creating a depression in the center to form the “nest.”
-
Weave the Twigs: Take a few flexible twigs and wrap them in a circular pattern around the moss base, tucking the ends into the moss to secure them. You can add a tiny dot of hot glue or wrap a piece of twine to hold stubborn twigs in place.
-
Fill: Fluff the moss to make it look natural. Place your chosen decorative eggs inside the nest.
Project 3: Dipped Wooden Egg Garland (Wall Hanging)
This adds a modern, Scandinavian touch.
You’ll need:
-
Unfinished wooden eggs (available at craft stores)
-
Acrylic paint in your chosen colors (e.g., blush pink, cream, sage green)
-
Twine or jute string
-
A small paintbrush
-
A needle with a large eye
Instructions:
-
Paint the Eggs: Hold each egg at the top and only dip the bottom 1/3 to 1/2 into the paint. Alternatively, paint the bottom half with a brush for more control. Let dry completely.
-
String Them: Thread your needle with a long piece of twine. Carefully push the needle through the top of the first egg and pull the twine through, leaving a long tail at the end for hanging. Tie a knot below the egg to keep it in place.
-
Continue: Repeat, spacing the eggs 4-6 inches apart, until your garland is the desired length. Tie a loop at each end for hanging.
Pro Tip: Vary the colors and the depth of the “dip” on each egg for a more organic look.
Project 4: “Carrot” Treat Cones (Table Accents)
Perfect for holding small candies, snacks, or silverware.
You’ll need:
-
Kraft paper or orange cardstock
-
Green ribbon or green crepe paper
-
Scissors
-
Tape or a glue stick
-
Candy or treats to fill
Instructions:
-
Form the Cone: Cut your paper into a large quarter-circle shape. Roll it into a cone shape and secure the seam with tape or glue.
-
Make the Tops: Cut several 4-inch pieces of green ribbon or strips of crepe paper. Gather them together and tape or glue them to the inside top seam of the cone to look like carrot greens.
-
Fill & Display: Fill the cones with treats and arrange them on your table or on individual place settings.
Project 5: Framed Spring Botanicals (Wall Art)
Simple and sophisticated art.
You’ll need:
-
A picture frame (try a rustic wood or a simple white frame)
-
Cardstock or nice paper for the background (cream, light gray, or blush)
-
Pressed flowers or small faux botanicals (ferns, lavender, eucalyptus)
-
Scissors
-
Double-sided tape or a glue dot
Instructions:
-
Prepare the Frame: Remove the glass and backing from the frame. Cut your cardstock to fit the backing board.
-
Arrange: Artfully arrange your pressed flowers or small sprigs on the cardstock. Less is more!
-
Secure: Once you’re happy with the arrangement, carefully secure each piece with a tiny dot of glue or a piece of double-sided tape.
-
Assemble: Place the artwork into the frame and secure the back.
How to Style Your DIY Easter Decor Set Together
-
Create a Centerpiece: Place the Moss Nests and Egg Vases on a runner down the middle of your table. Scatter a few of the “Carrot” Treat Cones between them.
-
Hang the Garland: Drape the Dipped Egg Garland across a mantel, a window, or behind your centerpiece on the wall.
-
Add Wall Art: Place the Framed Botanicals on the mantel or hang them on the wall to tie the natural theme together.
-
Use Common Elements: Repeating the same colors (blush, cream, green) and materials (twine, wood, moss) across all projects is what makes them feel like a intentional “set.”
Enjoy your crafting and have a beautiful, handmade Easter.


